You'll need
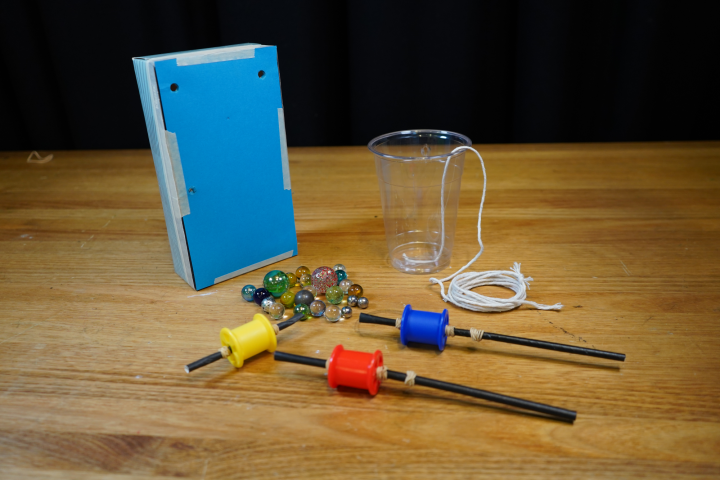
- An empty tissue box
- A length of string (at least 1 meter)
- Several straws (at least 3)
- Several spools (at least 4)
- Several elastic bands (at least 10)
- A paper or plastic cup
- A handful of marbles
- Sticky tape
What to do
Lift without pulleys
- Tape one end of the string to the inside bottom of the cup.
- Add some marbles to the cup, and try lifting it up by just holding the string. How difficult is it to lift
Lift with one pulley
- Make holes in your tissue box to hold the straw at the centre of each pulley. This will work best if you make holes through the front and back of the tissue box, so each straw is sliding through two holes (this will help it to stay upright).
- Slide a straw through both of the holes, and wrap an elastic band around each end. Push the elastic bands right up against the cardboard, so the straw can’t slide out.
- Slide a spool onto the straw, positioning it about 5 cm away from the cardboard backing. Add elastic bands to either side of the spool to hold it in place (but not so tightly that it can’t spin).
- Thread the length of string over the pulley, so you can try lifting the cup by pulling the string downwards. How does this compare to lifting it directly?
Lift with a block-and-tackle
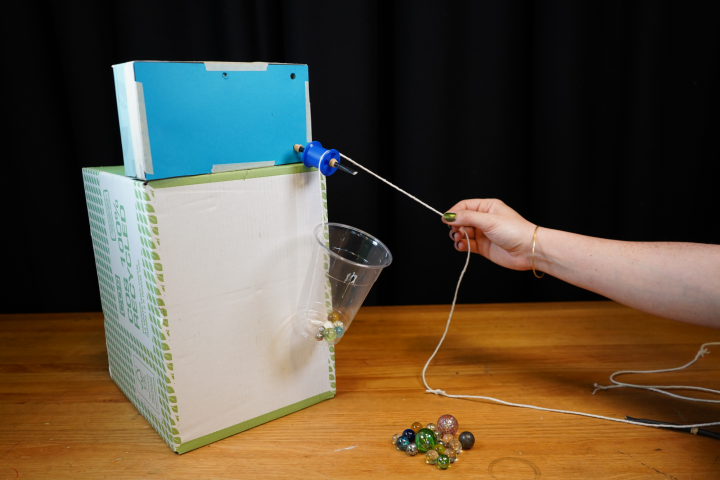
- Make a pulley to go inside your cup by cutting a straw to the width of the cup, sliding a spool onto it, and adding elastics on either side (just like for the straws holding the pulleys attached to the tissue box).
- Attach this pulley to the cup by first making a small hole on either side of the opening of the cup. Insert both ends of the snatch block straw into these holes, so the pulley is sitting inside the mouth of the cup.
- Thread the string from inside the cup, over the top pulley, then back around the pulley inside the cup. To lift the cup, you’ll pull the rope upwards. How difficult is it to lift the cup now?
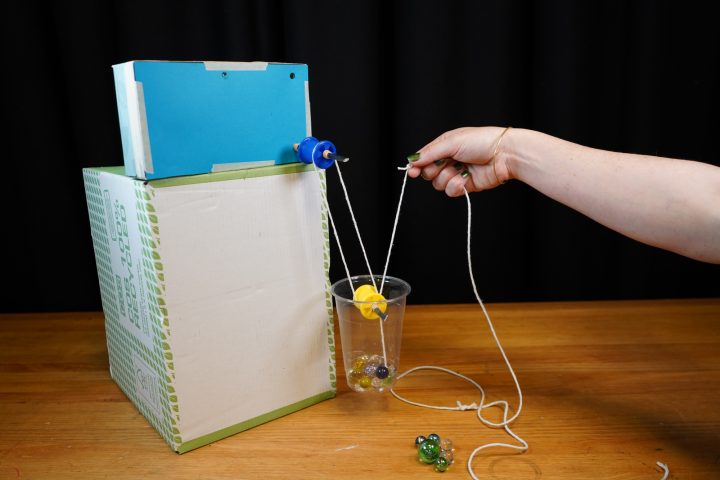
Add more pulleys!
- Try adding a second pulley to your shoebox, and experiment with different ways to wrap the rope around all the pulleys. If you’re using a cup with a wide-enough mouth, you can even add an extra pulley inside the cup!
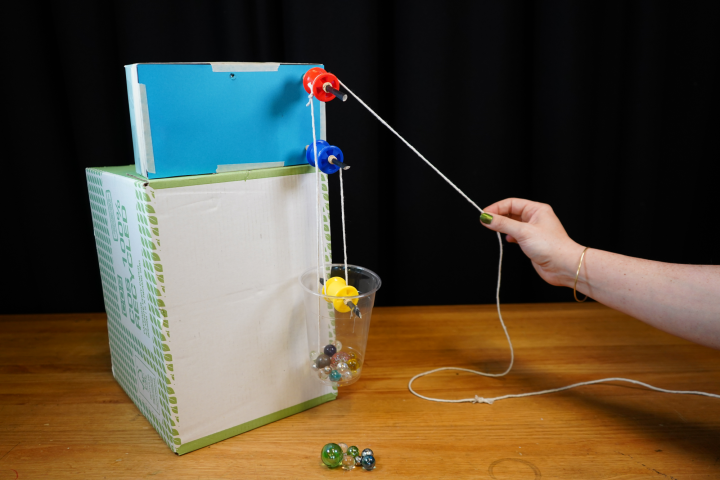
Questions to ask
How does the number of pulleys affect how easy or difficult it is to lift the cup?
Make a mark (or tie a knot) in your string, and notice how far it moves – how does adding extra pulleys affect this?
What’s happening
Pulleys are wheels over which rope is strung to make it easier to lift things!
There are two ways pulleys make it easier to lift things. The first is by changing the direction of a lifting force. It’s much easier to pull down rather than lift up. This is because when you’re pulling down, you’re working with your bodyweight instead of against it!
The second way that pulleys make things easier to lift is through mechanical advantage – by exchanging force for distance. Pulleys achieve mechanical advantage by ‘sharing’ a lifting force over a long distance of rope strung between multiple pulleys. When multiple pulleys are used like this, the force needed to lift something on the far end will be reduced, but the rope will need to be pulled further. These are called ‘block and tackle’ or ‘compound pulleys’ – the more pulleys there are, the easier something will be to lift!
Did you know
Archimedes, the Ancient Greek mathematician and inventor from 287 BCE, is credited with first inventing compound pulleys – like the block-and-tackle system in this experiment. He used compound pulleys in numerous inventions, including his ‘Archimedes’ Claw’ weapon of war. This weapon was designed to lift enemy ships from the water using a large metal grappling hook, lifting them upright and then sinking them!
Fun fact
Did you know? The oldest pulley ever found is 4000 years old, and was found in an Ancient Egyptian tomb. It was probably used to help build the incredible stone structures of Ancient Egypt!


